


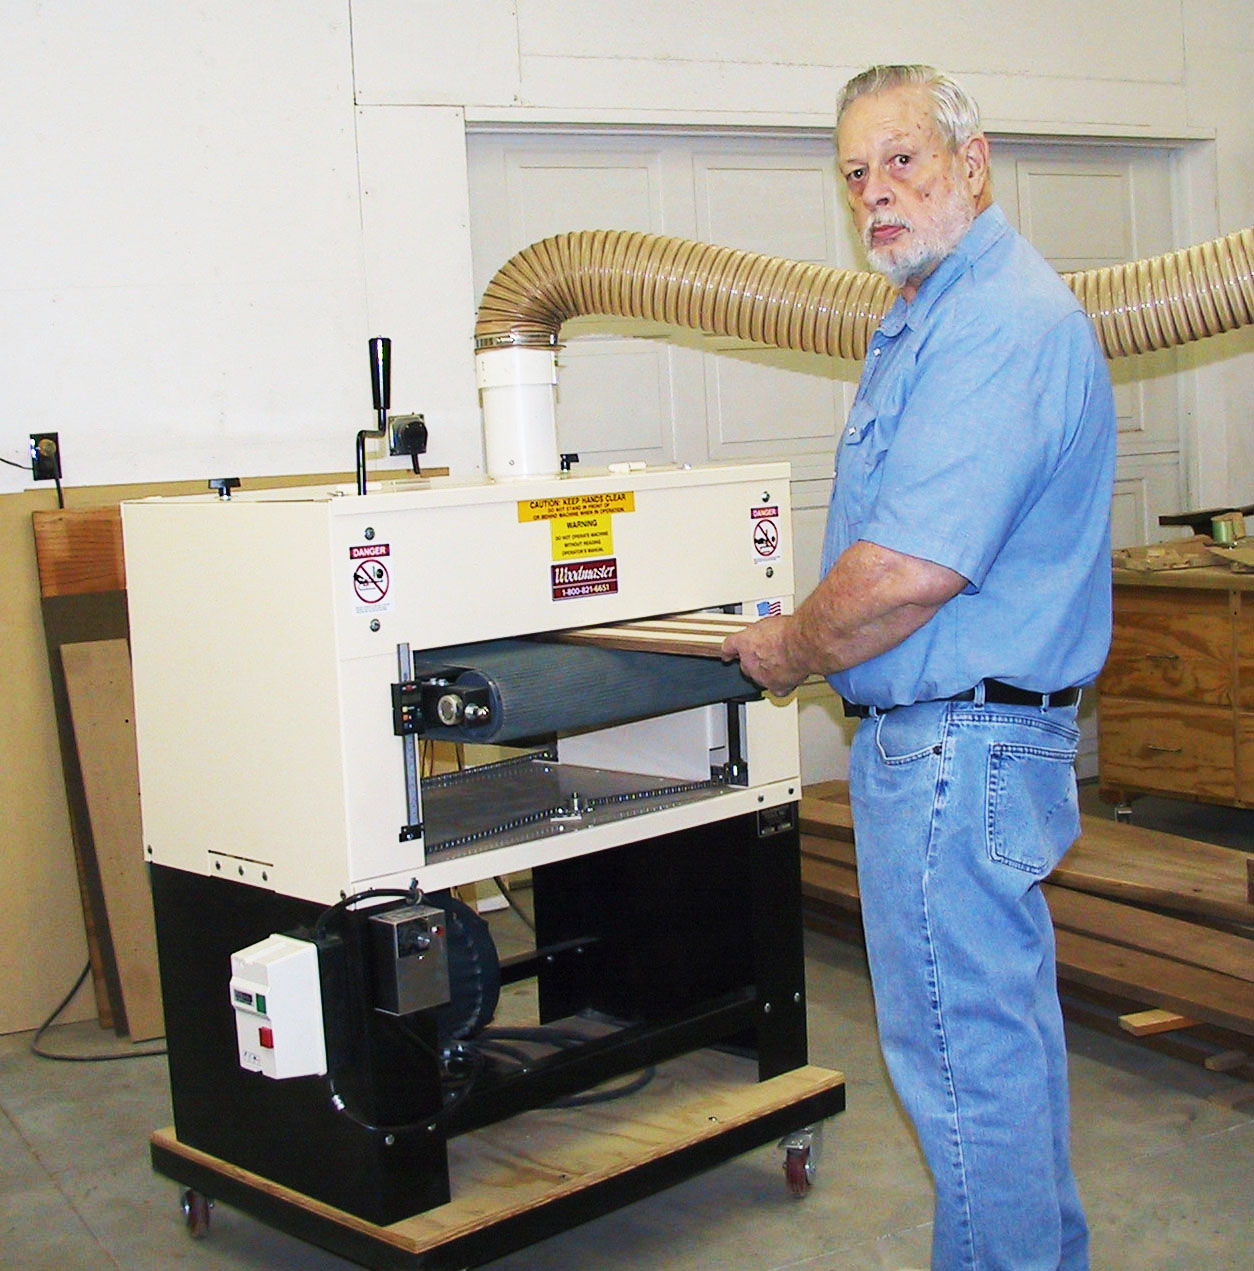
Here’s retired engineer and dedicated woodworker, Dennis Westphal, with his Woodmaster Drum Sander. Thanks, Dennis, for sharing your secrets for creating your exceptional “Wiggle Canes!”
Dennis Westphal is a woodworker who loves a challenge. Maybe his decades in engineering inspire him to take on highly complex projects. He certainly has a knack for merging two exacting disciplines — woodworking and engineering — in the production of his extraordinary “Wiggle Canes.”
Dennis has been kind enough to share specific “how-to” detail on his entire production procedure and we’re happy to pass it all along to you. Note he stresses the importance of the precision it takes to produce his 15-layer, laminated Wiggle Canes — the kind of precision he achieves with his Woodmaster Drum Sander.
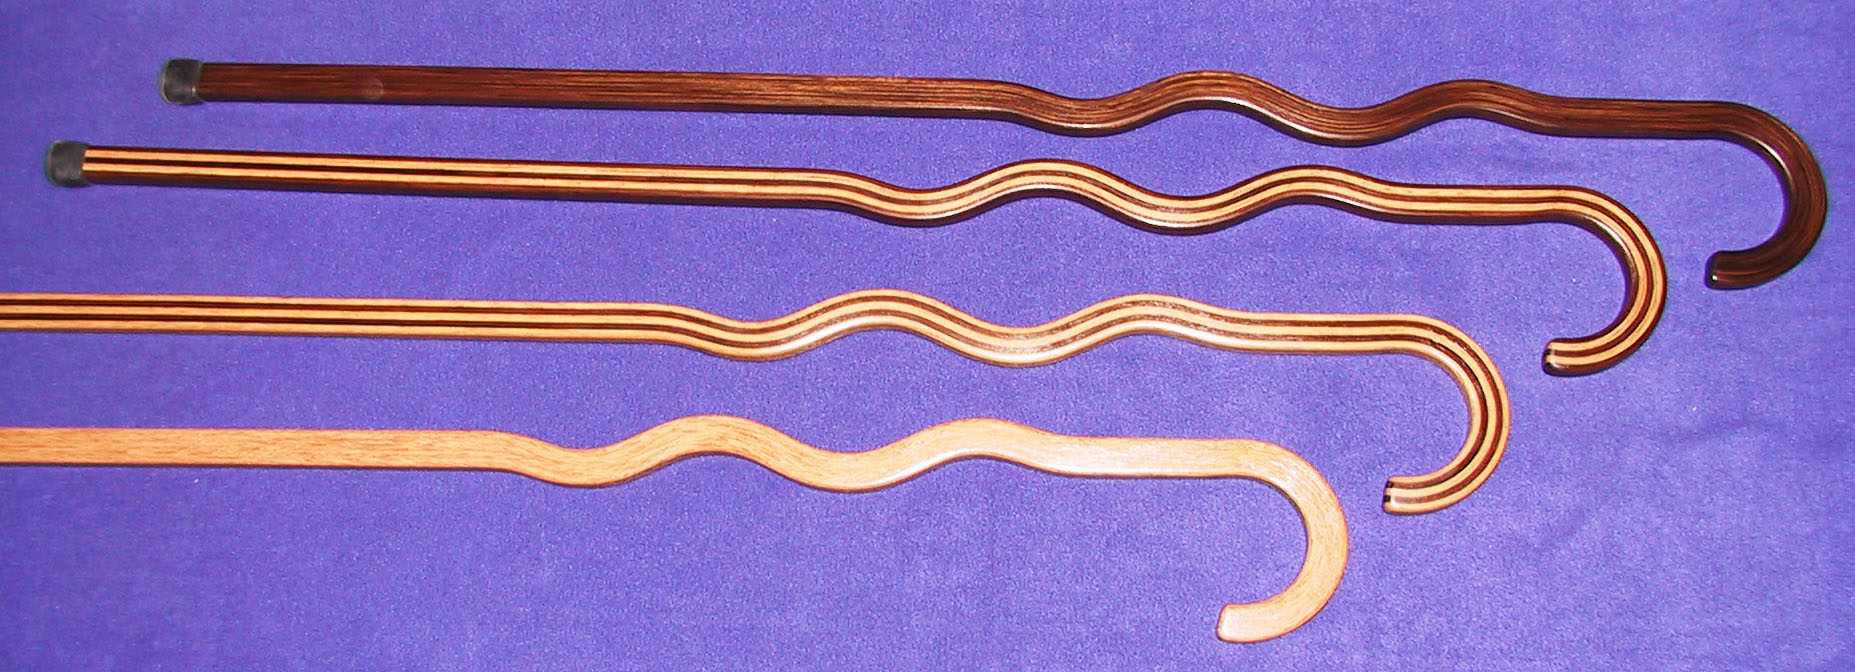
“I like to make unique woodworking projects, things that are a little different, things not a lot of people make. That’s why I make what I call ‘Wiggle Canes,’ functional walking canes with a definite wiggle in them. I like making them and I just like the way they look.
I’ve made Wiggle Canes as gift for people who need walking assistance, people we know who’ve moved into assisted living homes. People wouldn’t want to pay me for the time it takes — maybe 25 hours apiece between sawing, sanding, soaking, gluing, and finishing.
I like this 2675 Woodmster Drum Sander. I use it almost every day. I don’t know what I’d do if I didn’t have it. I guess I’d have to get another one! Thanks for the opportunity to show some of my projects to other woodworkers.
Precision Sanding is ESSENTIAL
 I got the Woodmaster Drum Sander because I wanted a machine that would give me precision and speed for the kind of work I do. I knew the precision this Drum Sander would give me. I did a lot of online research and read comments from Woodmaster owners. I asked questions and got pretty positive results. I chose the 26” 2675 because it’s big enough to handle any project I’d want to make.
Each cane is made of 15 layers of wood, each layer 1/16 of an inch thick. I glue up strips in five sections, with three layers in each section, and then glue the sections together.
I make them with different patterns. Some have layers of walnut on the outer layers and maple in the middle. Some have maple outer layers and walnut middle layers. I’ve made them of all walnut, and all oak. I build them extra long so they can be cut to the right length for the person who’s using them.
Dennis reveals how he does it…so you can make Wiggle Canes, too!
Ripping Strips
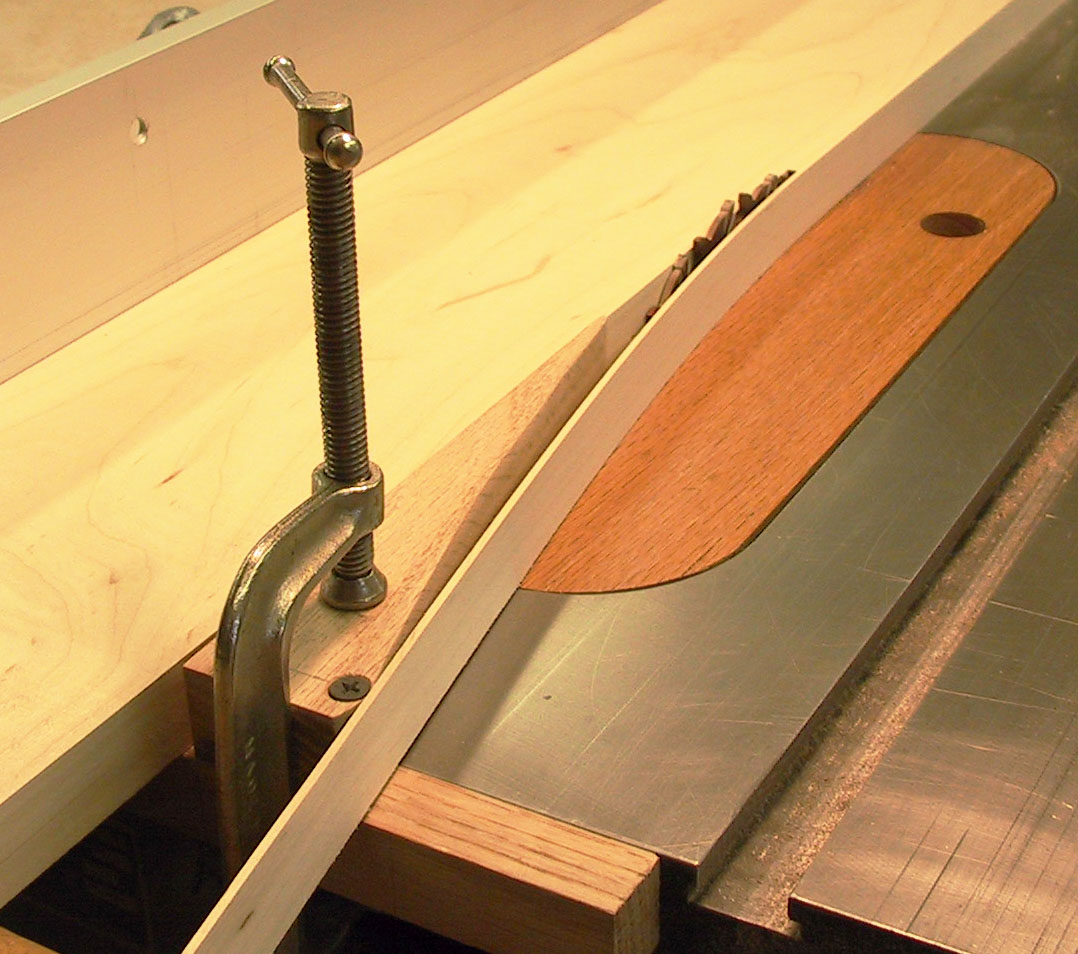 Here’s how I cut the strips on my table saw. The curved fixture behind the blade allows the strip to curve away from the stock piece to avoid binding.
Precision Thickness Control
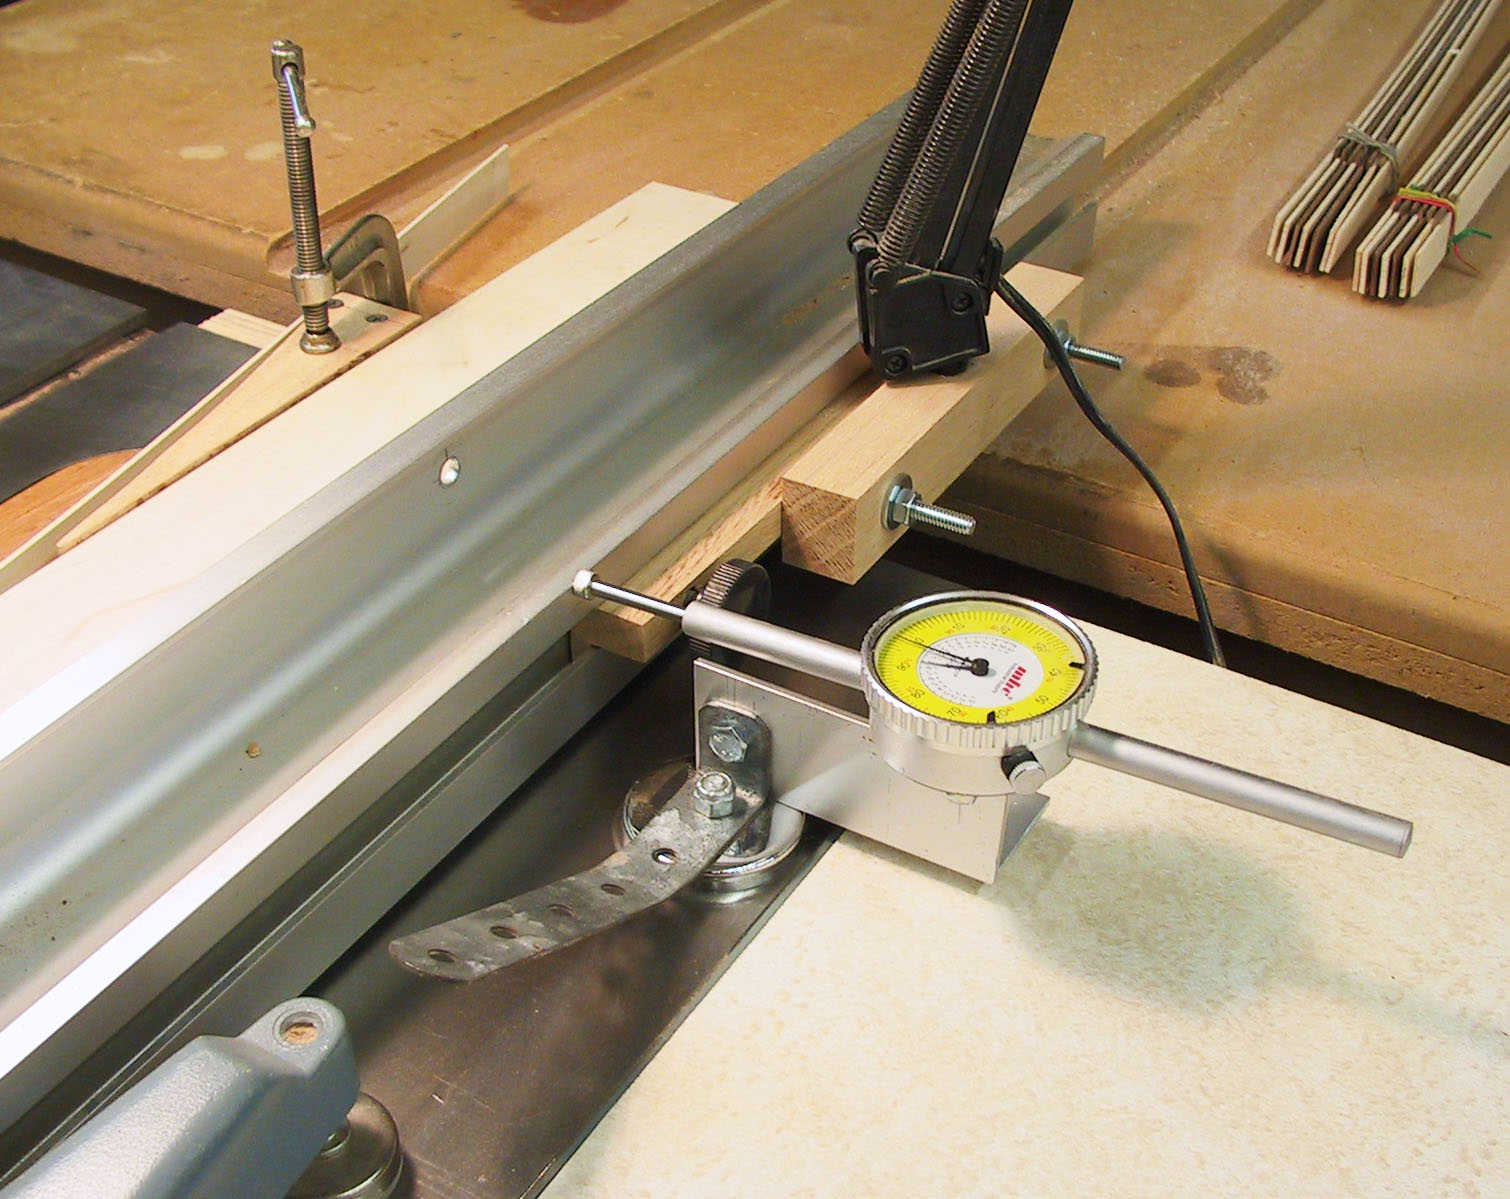 To control the thickness of the strips being cut, I use this dial indicator set-up. It is mounted on a magnetic base that sits on the top face of the saw on the right side of the fence. The plunger on this indicator moves in or out 0.100” per one full turn of the indicator pointer. This works well for what I need for the strips.
I make an initial skim cut on the stock to make sure the two edges of the stock are parallel, and to set up the cutting of the strip. After the skim cut is complete, without moving the fence, I place the indicator fixture in place by putting the indicator plunger against the right side of the fence and pushing it toward the fence for most of the available travel of the plunger. I stop the fixture with the indicator pointer at zero on the gauge. This zeros the gauge.
Next I move the fence toward the blade two full turns of the indicator pointer, stopping again at zero. Since this indicator moves 0.100” per turn, I have moved the fence 0.200”. This also moves the stock the same 0.200” from its zeroed position after the skim cut. Since I am using a 1/8” (0.125”) kerf ripping blade, the stock is now 0.075” (0.200” – 0.125”) to the left of the blade resulting in a nominal thickness of 0.075” for strip as it is cut.
Due to the blade not cutting exactly 0.125” and possibly some slight side-to-side movement of the stock as it is being pushed through, the actual stock thickness comes out in the 0.065” to 0.070” range.
This makes it ideal for one or two passes through the Woodmaster, with a very small amount being removed per pass. I end up with the desired 0.062” (1/16”) thickness. I always use scrap stock to cut some strips, both to confirm the thickness of the strip coming off the saw and to set the Woodmaster to the proper height and to know when that proper height is set, and if one or two passes are required.
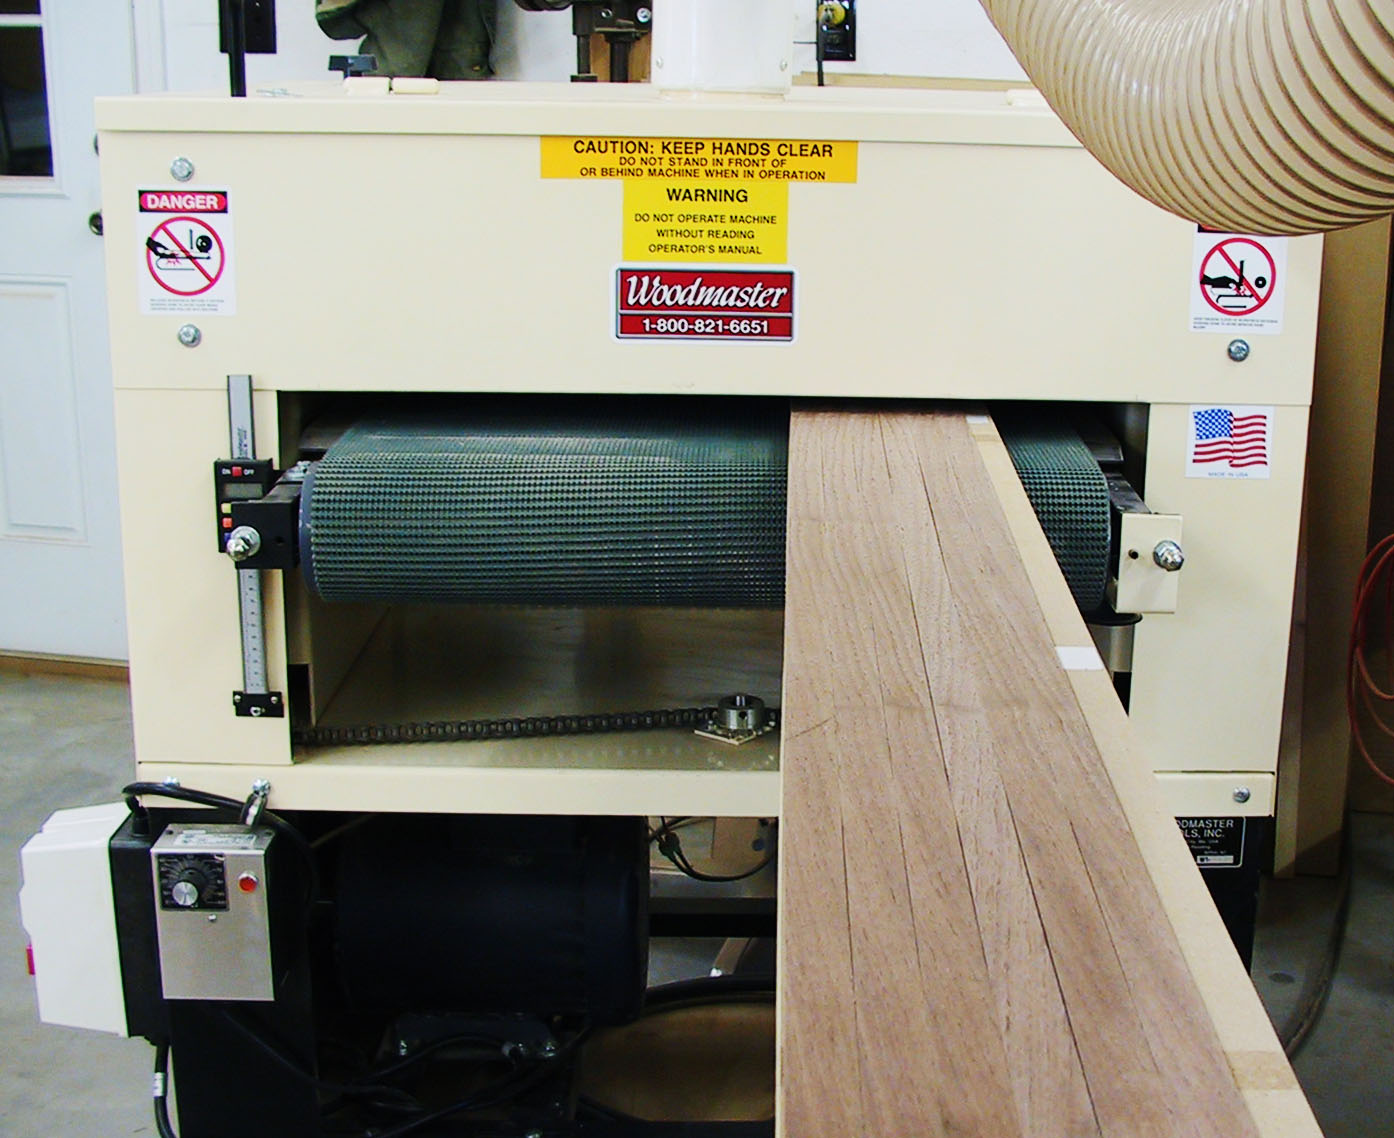
Sand to precise thickness with the Woodmaster Drum Sander
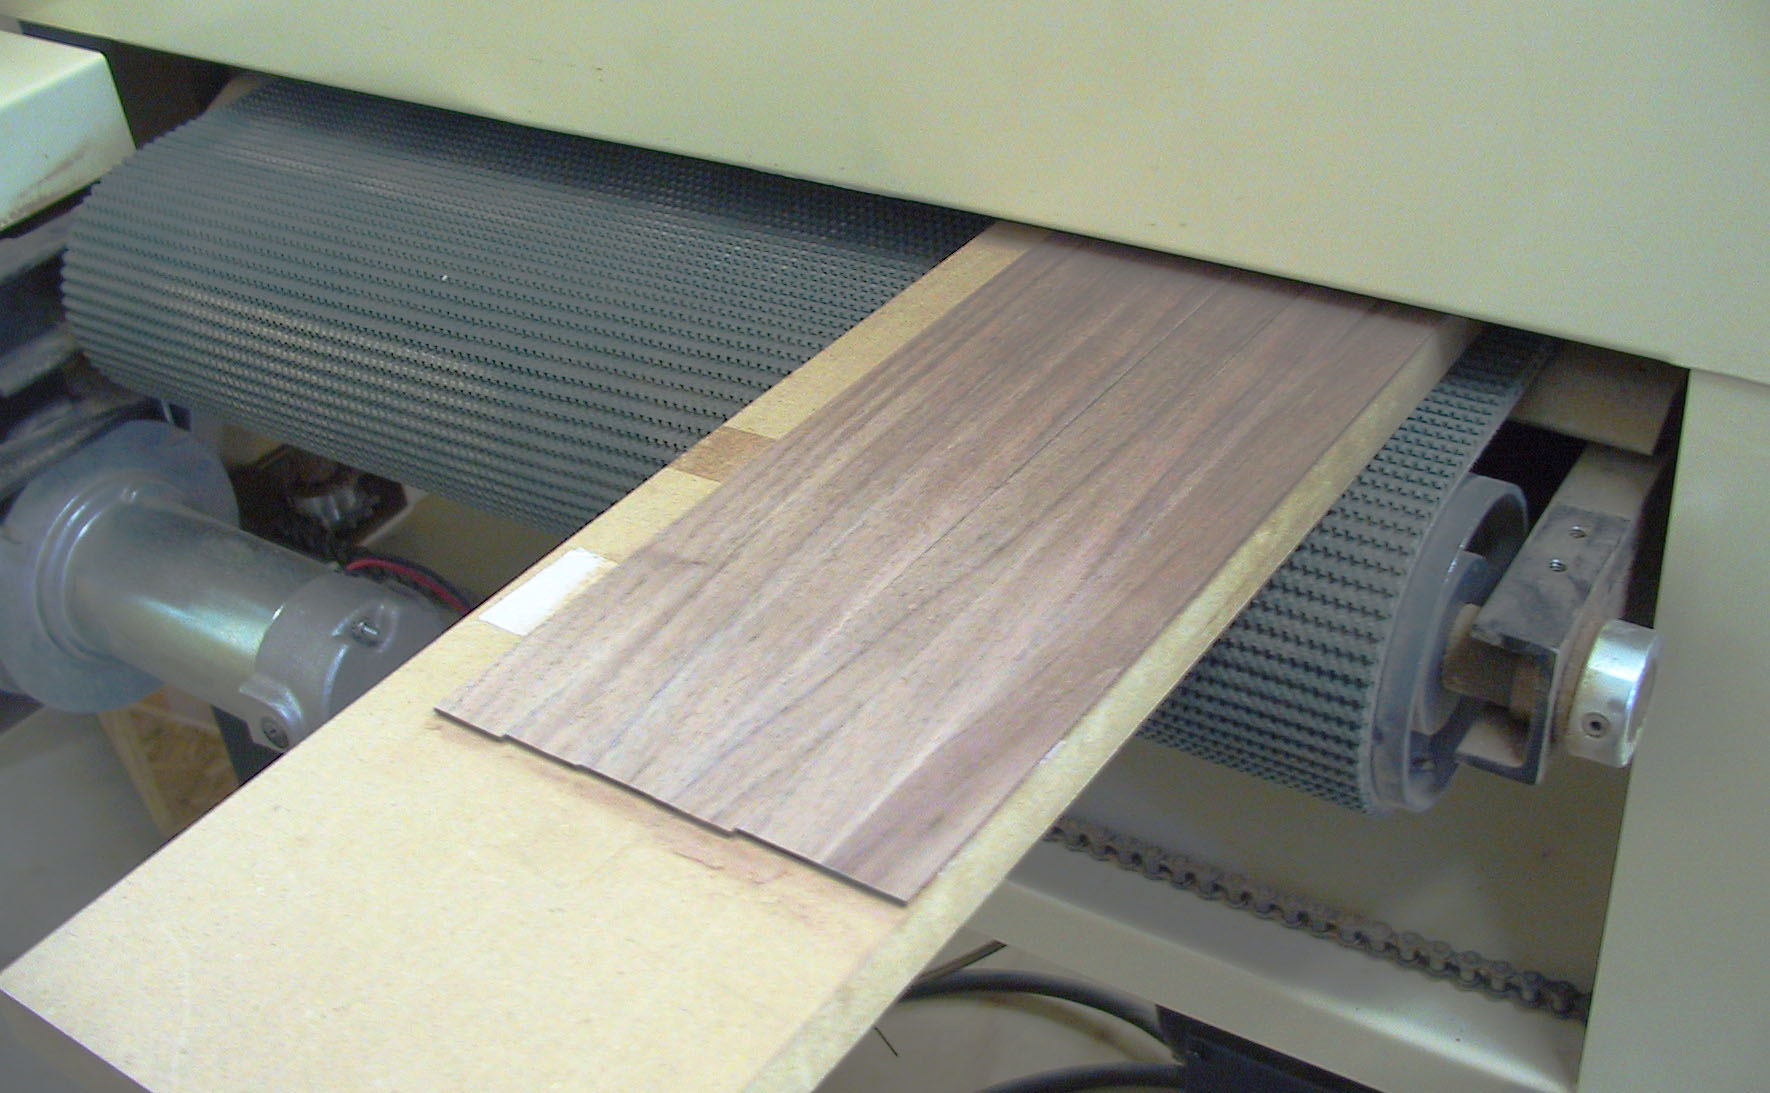 Here’s an MDF board with double stick tape that’ll hold the strips as I run them through my Woodmaster Drum Sander.
SAVE BIG NOW on Woodmaster Drum Sanders! – sale prices, online specials
SAVE BIG NOW on Woodmaster Molder/Planers! – sale prices, online specials
Gang-Sand Several Wood Strips for Uniform Thickness
I’ve attached six strips to the MDF board with double stick tape. This photo shows them feeding through my Woodmaster.
Soak Strips in Water for 24 Hours
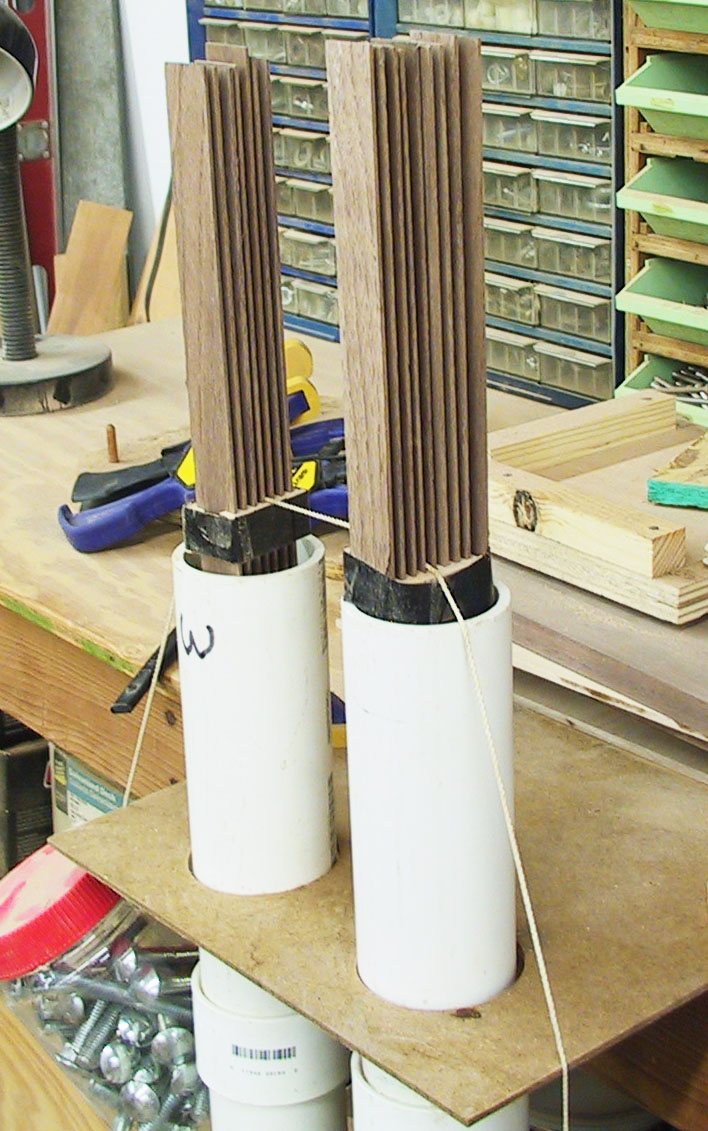 I soak strips in water for 24 hours after I sand them to the required thickness (1/16” or .062) in this water-filled PVC pipe fixture. I place small pieces of scraps between the strips to allow better contact between the water and strips. Then I hold the bundle together with rubber bands
Clamp Strips in a Drying Rack to Shape Them & Form the “Wiggle”
 After the strips are soaked in water for 24 hours, all fifteen strips are placed in the clamping/gluing fixture, clamped to form the Wiggle and the curved handle. They’re allowed to dry for a minimum of 24 hours. They are then removed and placed (in proper order) into this drying rack to fully dry. The way it is made, it holds the curves as the strips dry because, if the strips were to just dry loose, they would lose most of the curves — they’d tend to go back to their initial flat shape. As noted above, since only five strips are glued at one time, this holds the remaining pieces in the proper shape until they can be glued.
Apply Glue to Strips Mounted on a Gluing Fixture
 This fixture holds each strip as I add the glue using a roller. Due to the shape of the strips, it is very difficult to roll on the glue with one hand while trying to hold it with the other hand, so I came up with this.
Glue Strips & Clamp Tightly
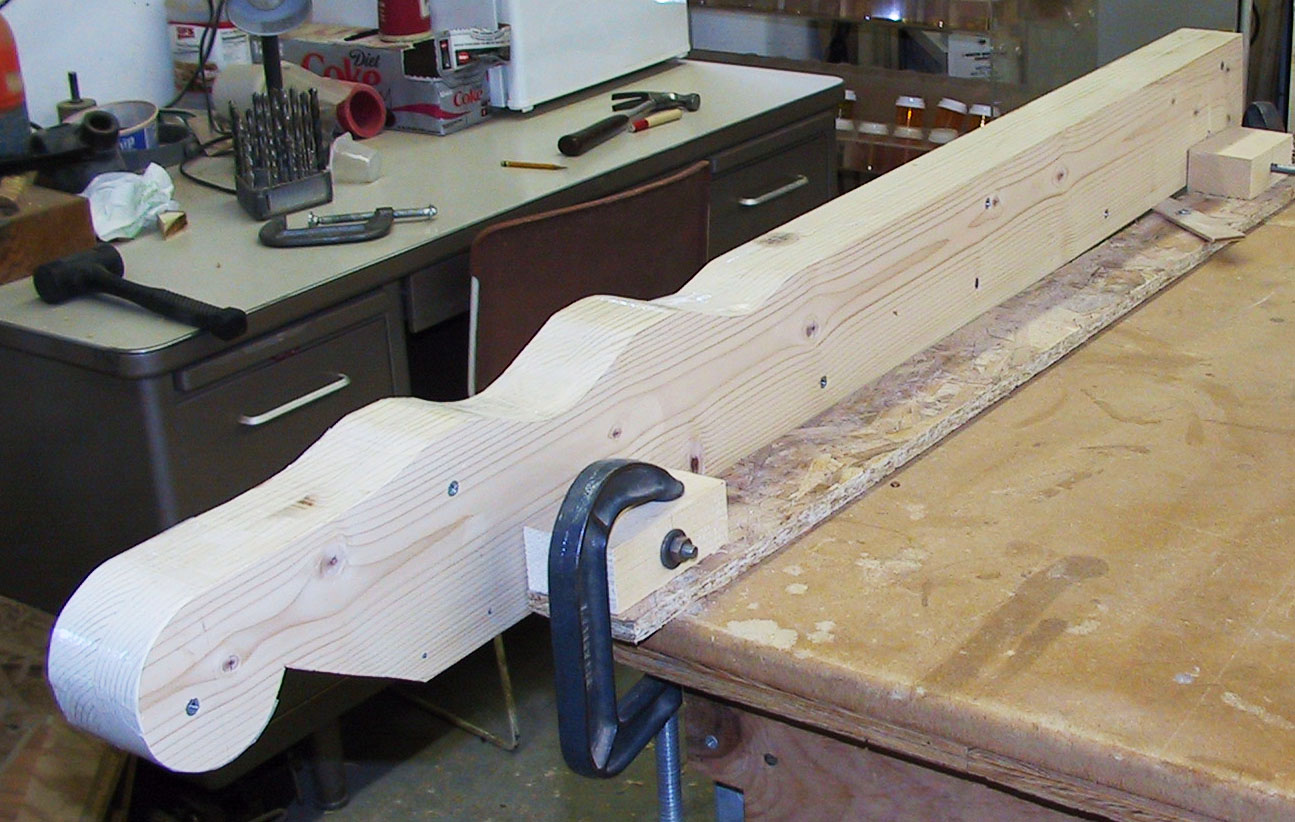
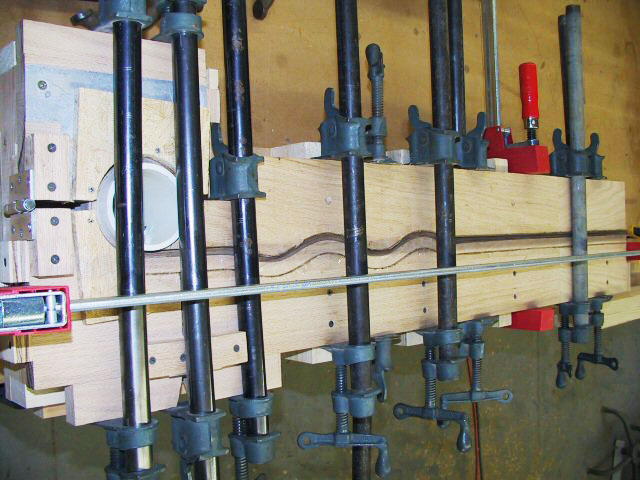 This photo shows an overhead view of my clamping/gluing fixture in place with the first five strips in place. Due to the complexity of putting the glue on the strips, putting them together, putting them into the fixture, properly aligning everything, and adding the clamps, you only have time for five strips before the glue starts to set up. To hold everything in place, a spacer equal to the thickness of the other 10 strips is added. After 24 hours, the spacer and the five glued up strips are removed from the fixture. The spacer is replaced by a thinner one that is equal to the thickness of five strips. Next, the second five strips are glued to the first five and placed back into the fixture with the thinner spacer, clamped and allowed to sit again for 24 hours. This is repeated a third time with the final five strips and no spacer, again for 24 hours. Then sand and apply a finish.
Notes from Dennis…
I’m a retired engineer and I enjoy making Wiggle Canes because they’re a blend of engineering and woodworking. I’ve got a CAD application on my computer and I lay out everything with it. I figure out all the ‘what ifs’ and see what each can would look like. I make half a dozen drawings then draw the individual pieces and parts.
Giving credit where it’s due, the concept of the Wiggle Cane is not mine. I picked up the idea from a woodworking site from a woodworker who goes by the name “Nimrod.” The fixtures and procedures noted above are all mine but Nimrod gave me the idea to develop them and make the canes. Nimrod’s canes were the curved handle version, but the “Gentleman’s” cane with the different handle that is added to the Wiggle portion is my idea and development.”
— Dennis Westphal, Woodmaster Drum Sander owner, Galva, Kansas
SAVE BIG NOW on Woodmaster Drum Sanders! – sale prices, online specials
SAVE BIG NOW on Woodmaster Molder/Planers! – sale prices, online specials
QUESTIONS? COMMENTS?
3 WAYS we can help you!
- Call us TOLL FREE 1-800-821-6651
• Email us info@woodmastertools.com
• Connect with us on Facebook